Checkout
Collect payment, print receipts, split bills, and manage completed sales
Checkout is how you collect payment after a client's visit. The whole process happens in a panel that slides in from the right — no page navigation needed.
Starting a checkout
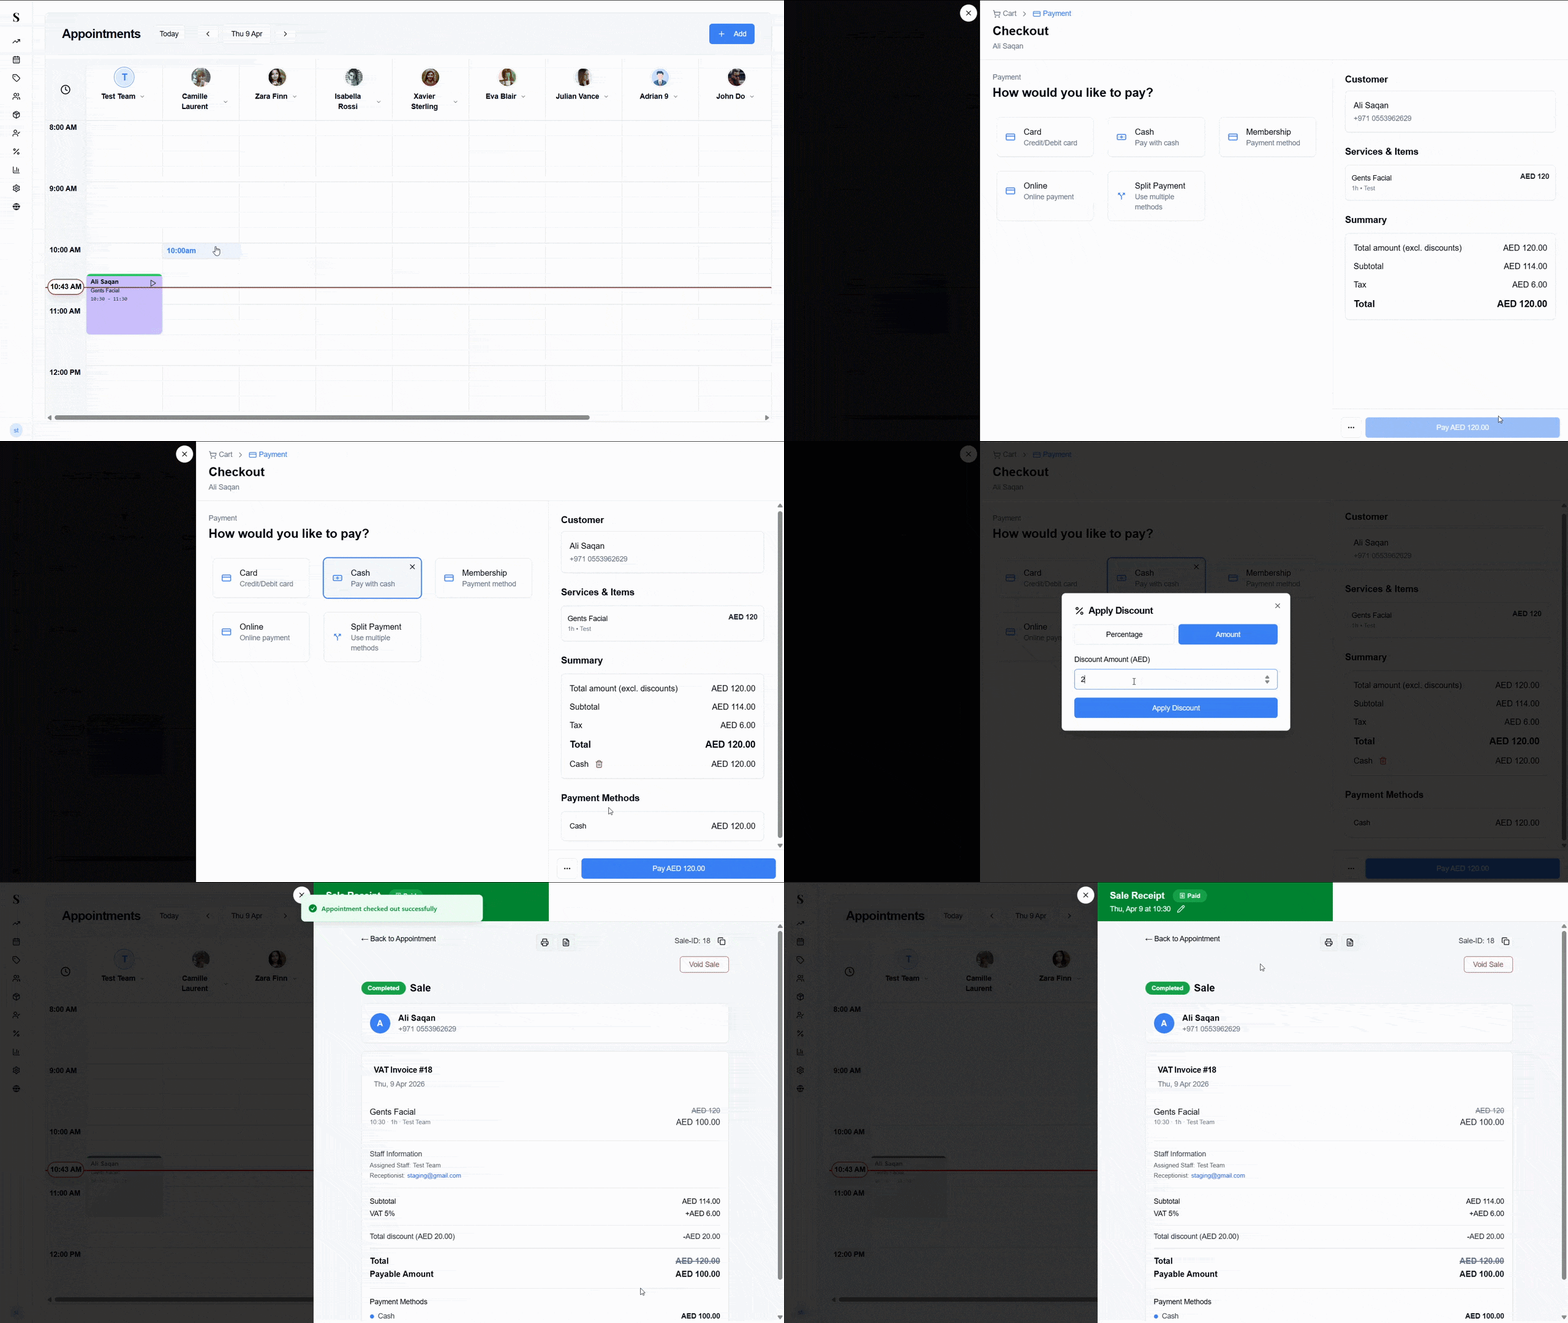
On the Calendar, click on the appointment card you want to check out.
In the Edit Appointment panel that opens, click the Checkout button at the bottom right.
The checkout screen slides in from the right, showing the client's name and the services from the appointment already loaded.
The checkout screen
The checkout screen is split into two areas:
Left — Payment Choose how the client is paying. The available options are shown as cards:
| Option | Description |
|---|---|
| Card | Credit or debit card |
| Cash | Pay with cash |
| Membership | Redeem a pre-paid session from the client's membership |
| Online | Online payment |
| Split Payment | Divide the bill across more than one payment method |
Click the option that applies. The selected method will be highlighted.
Right — Order summary Shows the client's name and phone number, the services being charged, and a full summary:
- Total amount (excluding discounts)
- Subtotal (after any discount)
- VAT (5%)
- Total due
- The chosen payment method and amount
Managing cart items
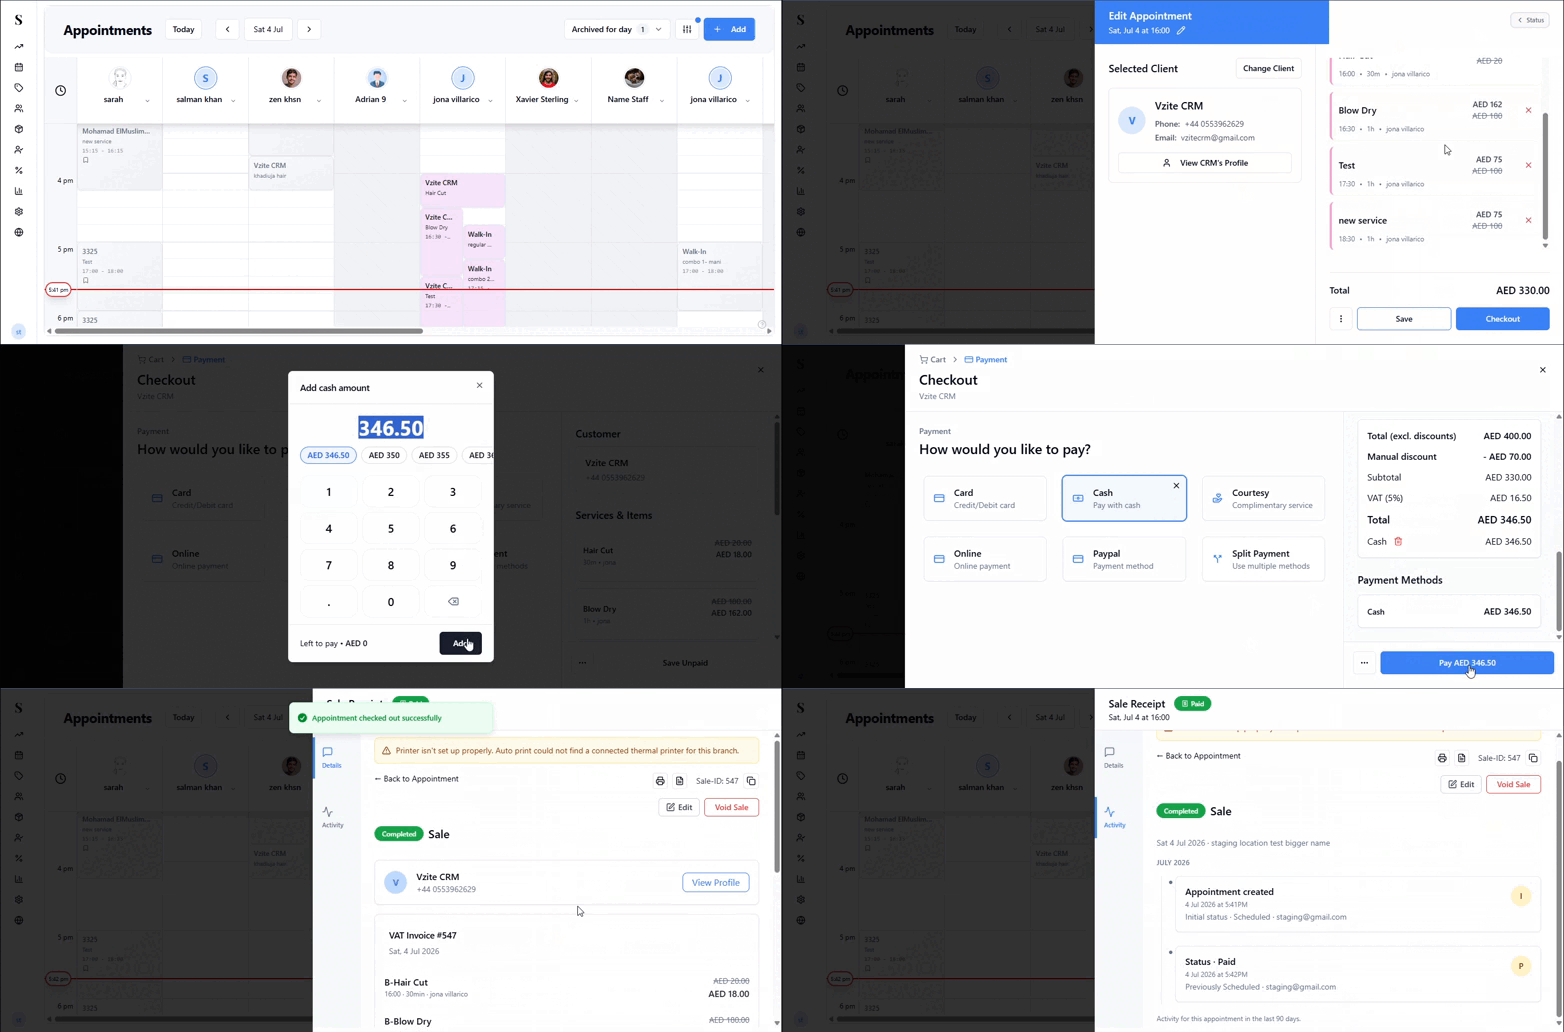
The services and products loaded into the checkout are displayed as cart items on the right. You can manage them before finalising the sale:
- Select an item — click on any cart item to highlight it. This lets you apply discounts or remove individual items without affecting the rest of the order.
- Add more items — you can add products, services, memberships, or vouchers to the cart even after opening checkout
- Remove an item — select an item and click the remove option to take it off the bill
- Change quantity — for products, you can adjust the quantity up or down
You are not limited to what was on the appointment. If the client decides to buy a product or add another service at the last minute, you can add it directly in checkout.
Applying discounts, tips, and vouchers
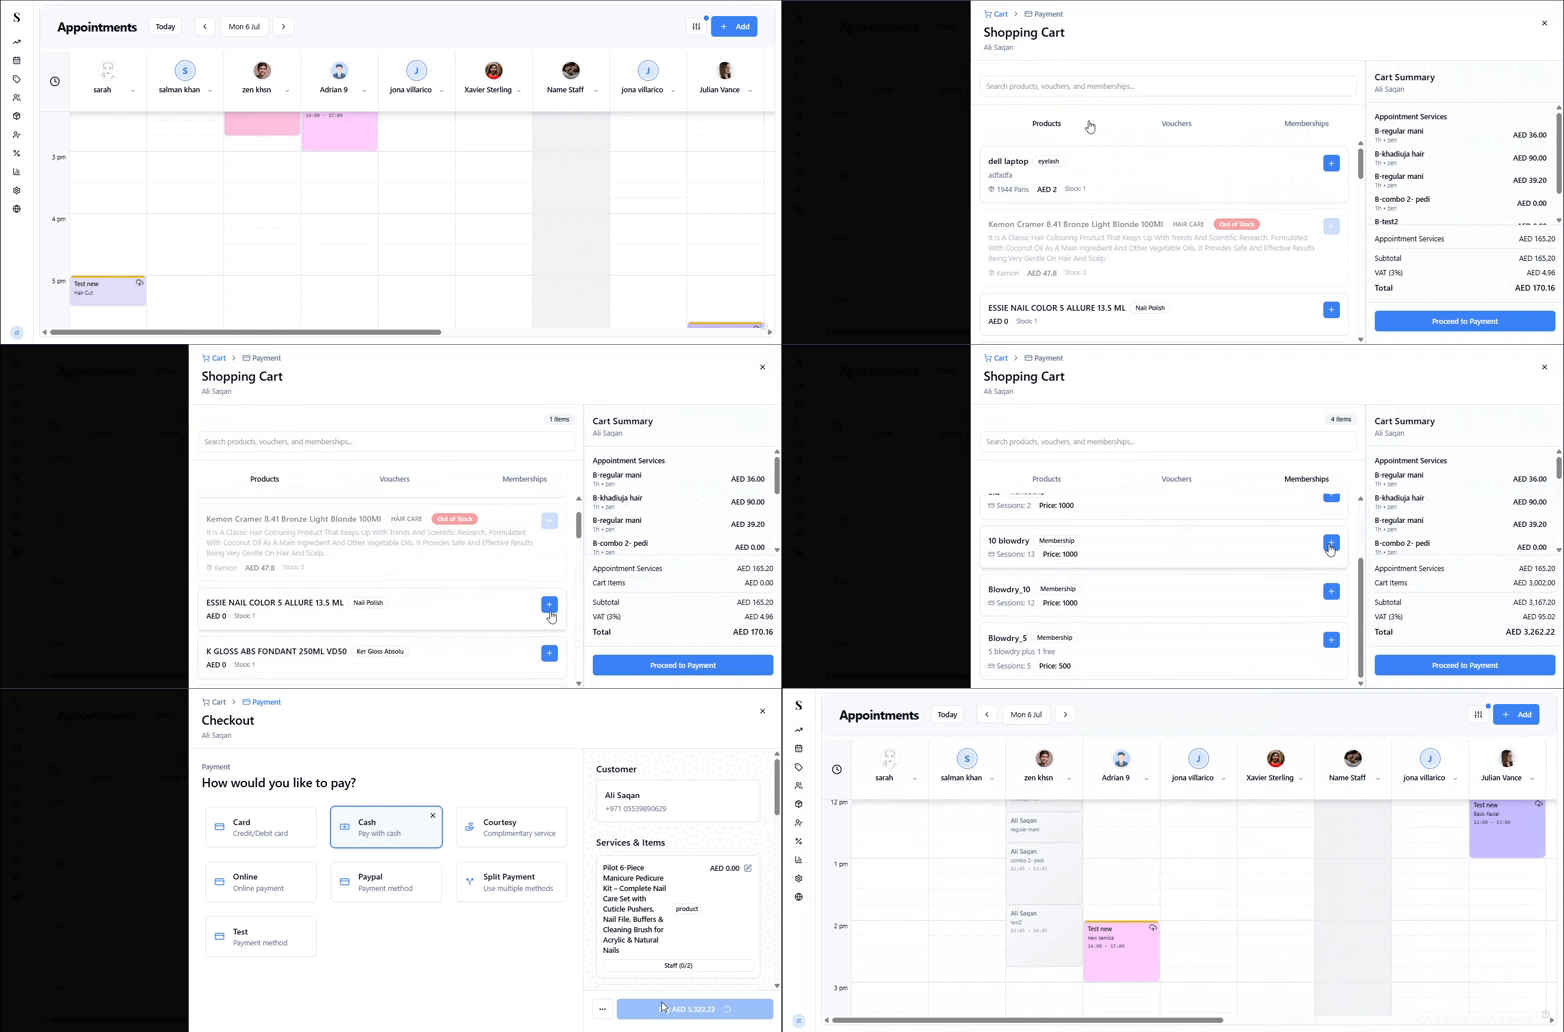
At the bottom left of the checkout screen, click the ··· (three dots) button to reveal additional options:
| Option | What it does |
|---|---|
| Apply Discount | Add a fixed or percentage discount to the sale |
| Add Tip | Add a gratuity for the staff member |
| Split Payment | Divide the total across multiple payment methods |
| Apply Voucher | Redeem a voucher code to reduce the balance |
Split Payment
Split Payment lets a client pay using more than one method — for example, part cash and part card, or split across multiple people. This is useful when friends are sharing a bill, or when a client wants to use a voucher for part of the payment and pay the rest by card.
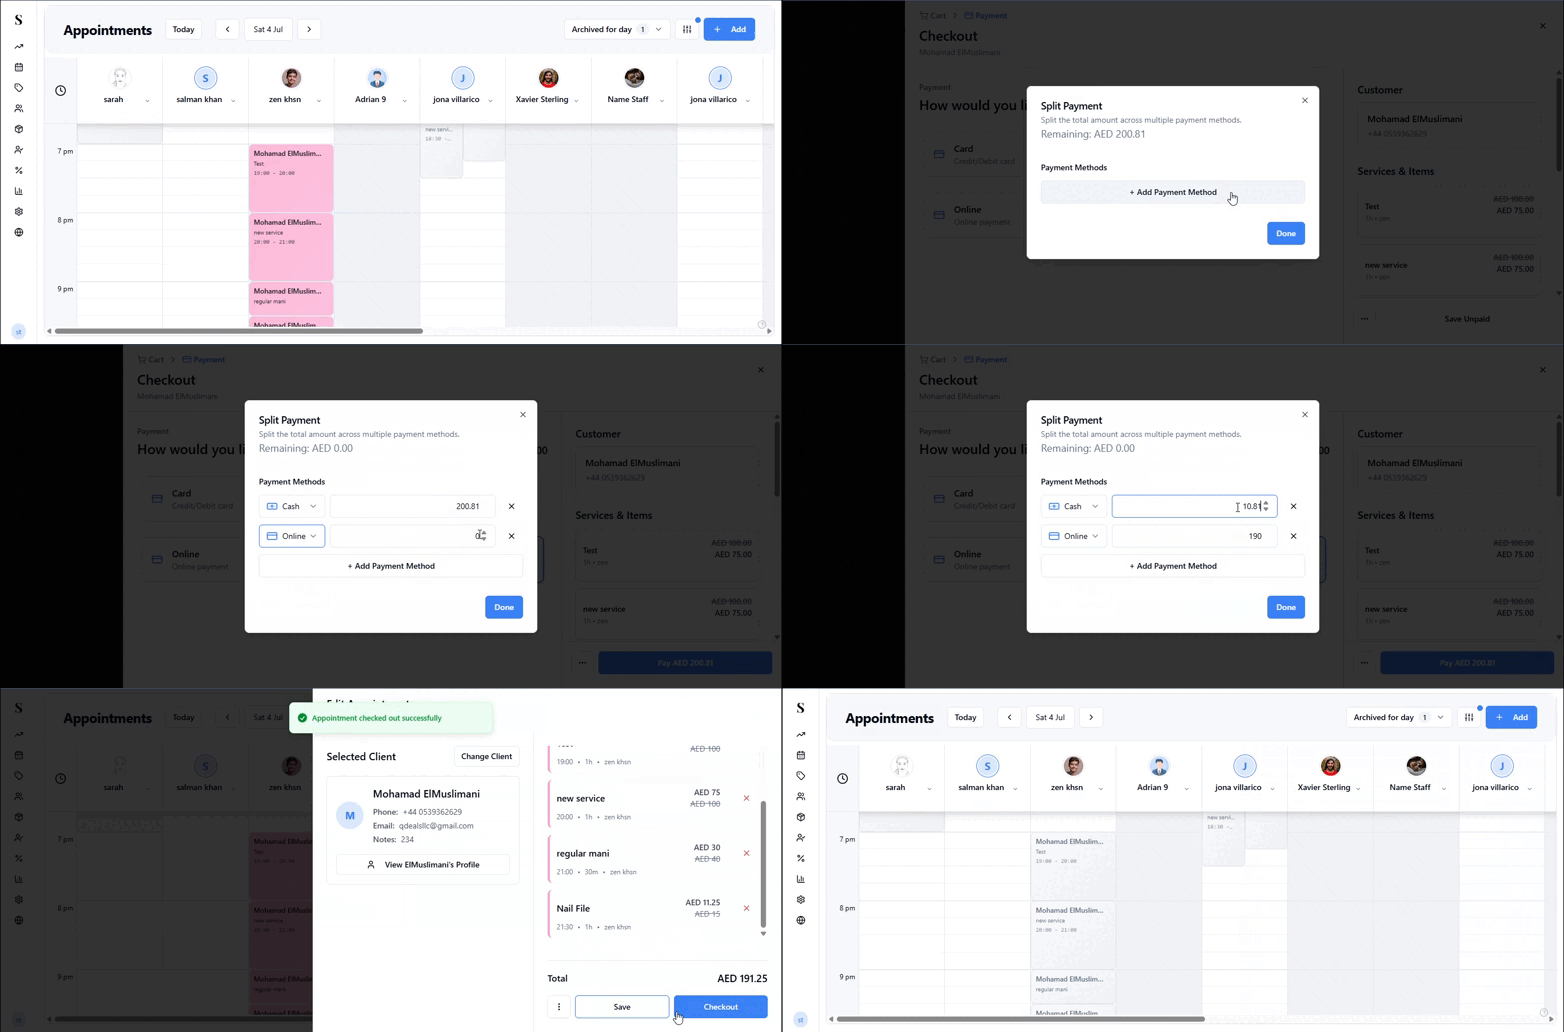
On the checkout screen, click the Split Payment payment card, or open the ··· menu and choose Split Payment.
A dialog opens showing the total amount due at the top and a list of payment methods below.
Click + Add Split to add a new payment line. Choose the payment method (Card, Cash, Voucher, etc.) and enter the amount for that portion.
Add as many splits as you need. The remaining balance updates automatically as you allocate amounts.
Click Confirm to apply the split. The checkout screen now shows all the payment methods and their allocated amounts.
If the split payments add up to less than the total, the remaining balance is shown clearly. If a split exceeds the total, you will see an overpayment alert — adjust the amounts so they match the total due.
Split payment example
A client's total is AED 300. They want to:
- Pay AED 150 by card
- Use a AED 100 voucher
- Pay the remaining AED 50 in cash
Just add three splits — one for each method with the correct amount. The system tracks it all and prints each payment method on the receipt.
Completing the payment
Once you have selected the payment method and applied any discounts or tips, click the Pay AED [amount] button at the bottom right to finalise the sale.
Sale receipt
After payment is confirmed, the Sale Receipt screen appears. The header turns green and shows a Paid badge confirming the transaction is complete.
From here you can:
Print the receipt
Click the print icon (or the document icon for A4) to open the Invoice Preview. You will see two format options:
- Thermal Receipt (80mm) — formatted for a POS receipt printer
- Standard Invoice (A4) — a full-page formatted tax invoice
Both formats show:
- Your salon name, TRN, and branch location
- Invoice number, date, time, and receptionist
- Customer name and phone
- Services performed and the staff team
- Subtotal, VAT (5%), and total
- How the sale was paid (including all split payment methods)
- "Thank you for your visit!" at the bottom
For Thermal Receipt, you can Download PDF or Browser Print. For Standard Invoice, click Print.
View the client's profile
From the sale receipt screen you can navigate directly to the client's full profile to see their history, memberships, and vouchers.
Void a sale
If a mistake was made, click the Void Sale button (shown in red on the right side of the receipt screen). This will cancel the transaction and reverse the sale record.
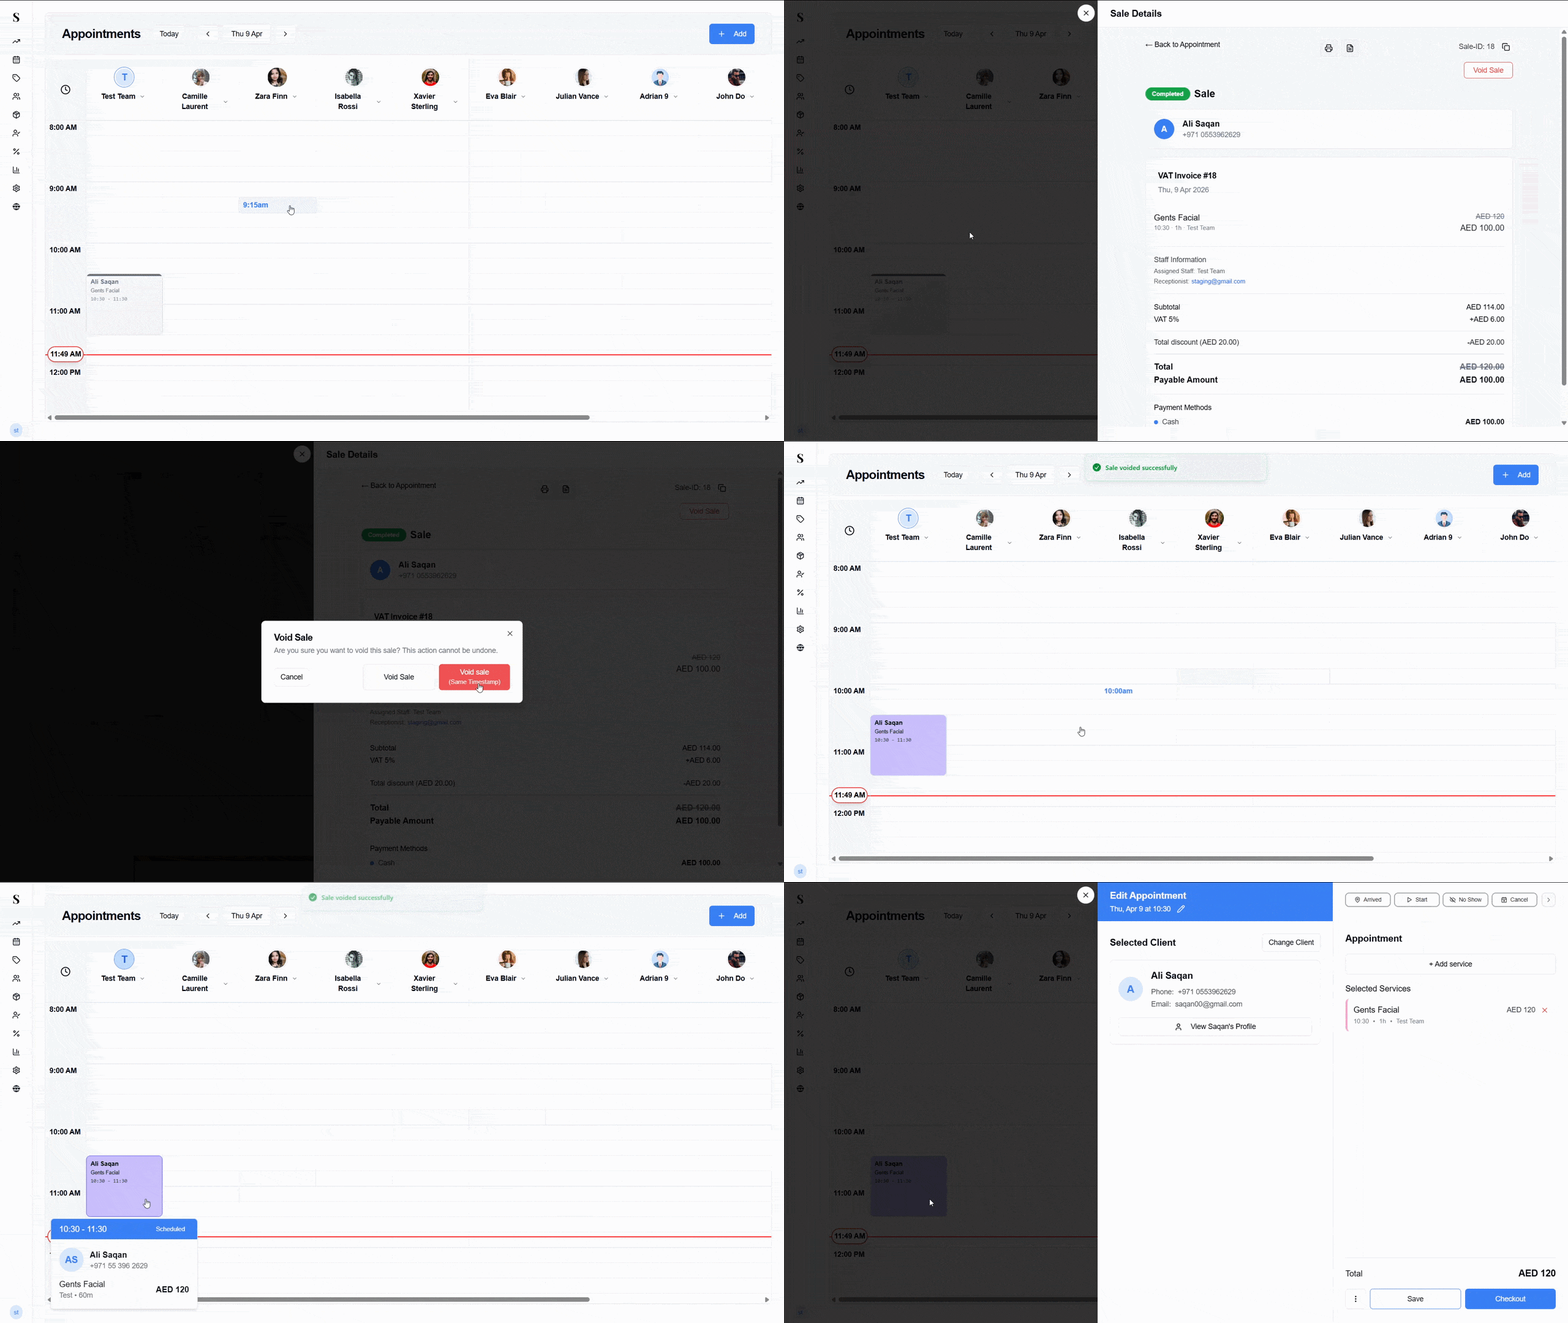
Voiding a sale cannot be undone. Only void a sale if you are certain there was an error — for example, the wrong client was charged or the wrong services were added.
Checkout summary
| Step | What happens |
|---|---|
| Click Checkout on the appointment | Checkout panel slides in with services pre-loaded |
| Select and manage cart items | Click items to edit, add more services or products on the fly |
| Choose a payment method | Card, Cash, Membership, Online, or Split |
| Apply extras via ··· menu | Discount, tip, split payment, or voucher |
| Use Split Payment | Divide the bill across multiple methods or payers |
| Click Pay | Sale is recorded and receipt screen appears |
| Print receipt | Choose Thermal (80mm) or Standard Invoice (A4) |
| Void Sale | Cancels and reverses the transaction if needed |