Settings
Configure your branches, business hours, payment methods, currency, VAT settings, and permissions
Settings is where you control the core configuration of your salon. Click Settings in the left menu to get started. There are five sections: Branches, Calendar, Payment Methods, Currency, and Permissions.
Settings is only accessible to admin users.
Branches
Settings → Branches
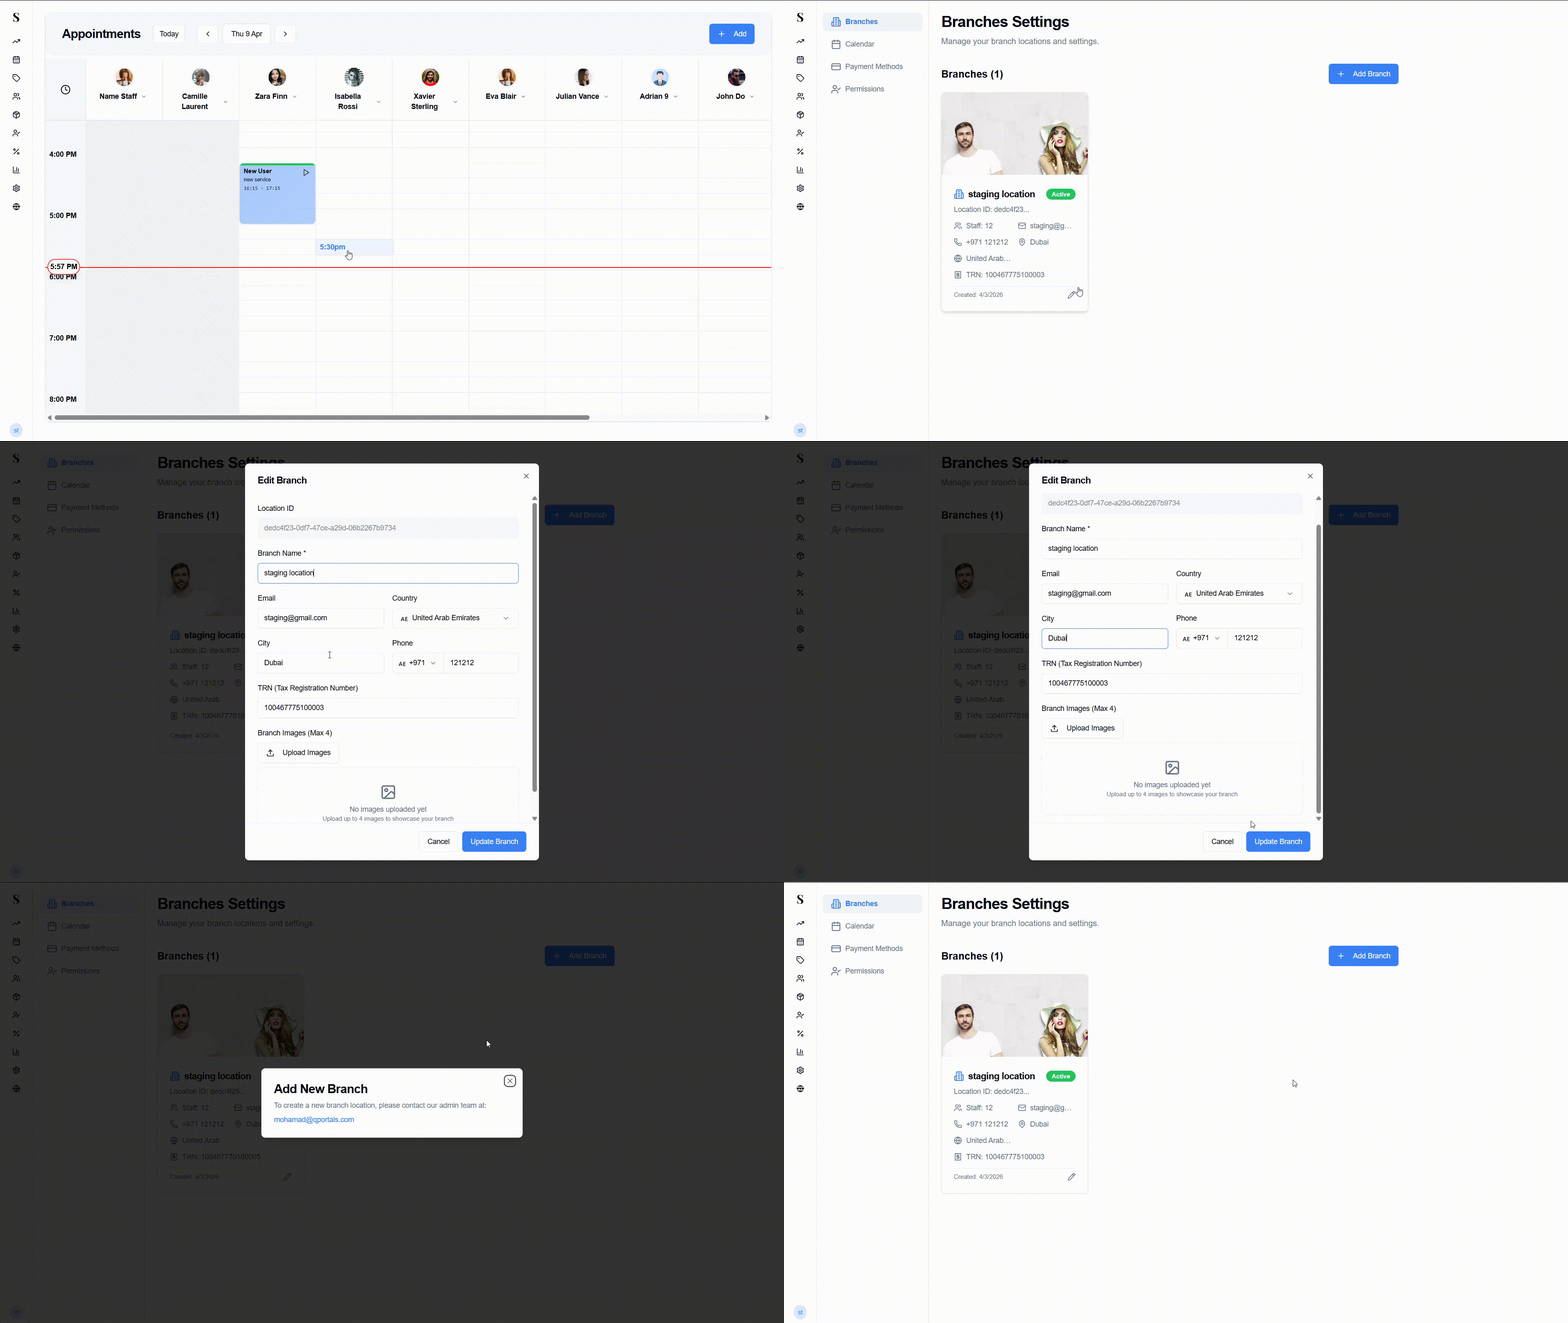
The Branches page shows all your salon locations. Each branch is displayed as a card showing:
- Branch photo
- Branch name and Active status badge
- Location ID
- Number of staff assigned
- Contact email and phone
- City and country
- TRN (Tax Registration Number)
- Date the branch was created
- A pencil icon to edit the branch
Editing a branch
Click the pencil icon on any branch card to open the Edit Branch form.
Fields you can update:
- Branch Name (required)
- Country (with flag selector)
- City
- Phone (with country code selector)
- TRN — your Tax Registration Number, printed on invoices
- Branch Images — upload up to 4 photos to showcase the branch (shown on the card)
Click Update Branch to save.
The Location ID is shown at the top of the form but cannot be edited — it is a system-generated identifier.
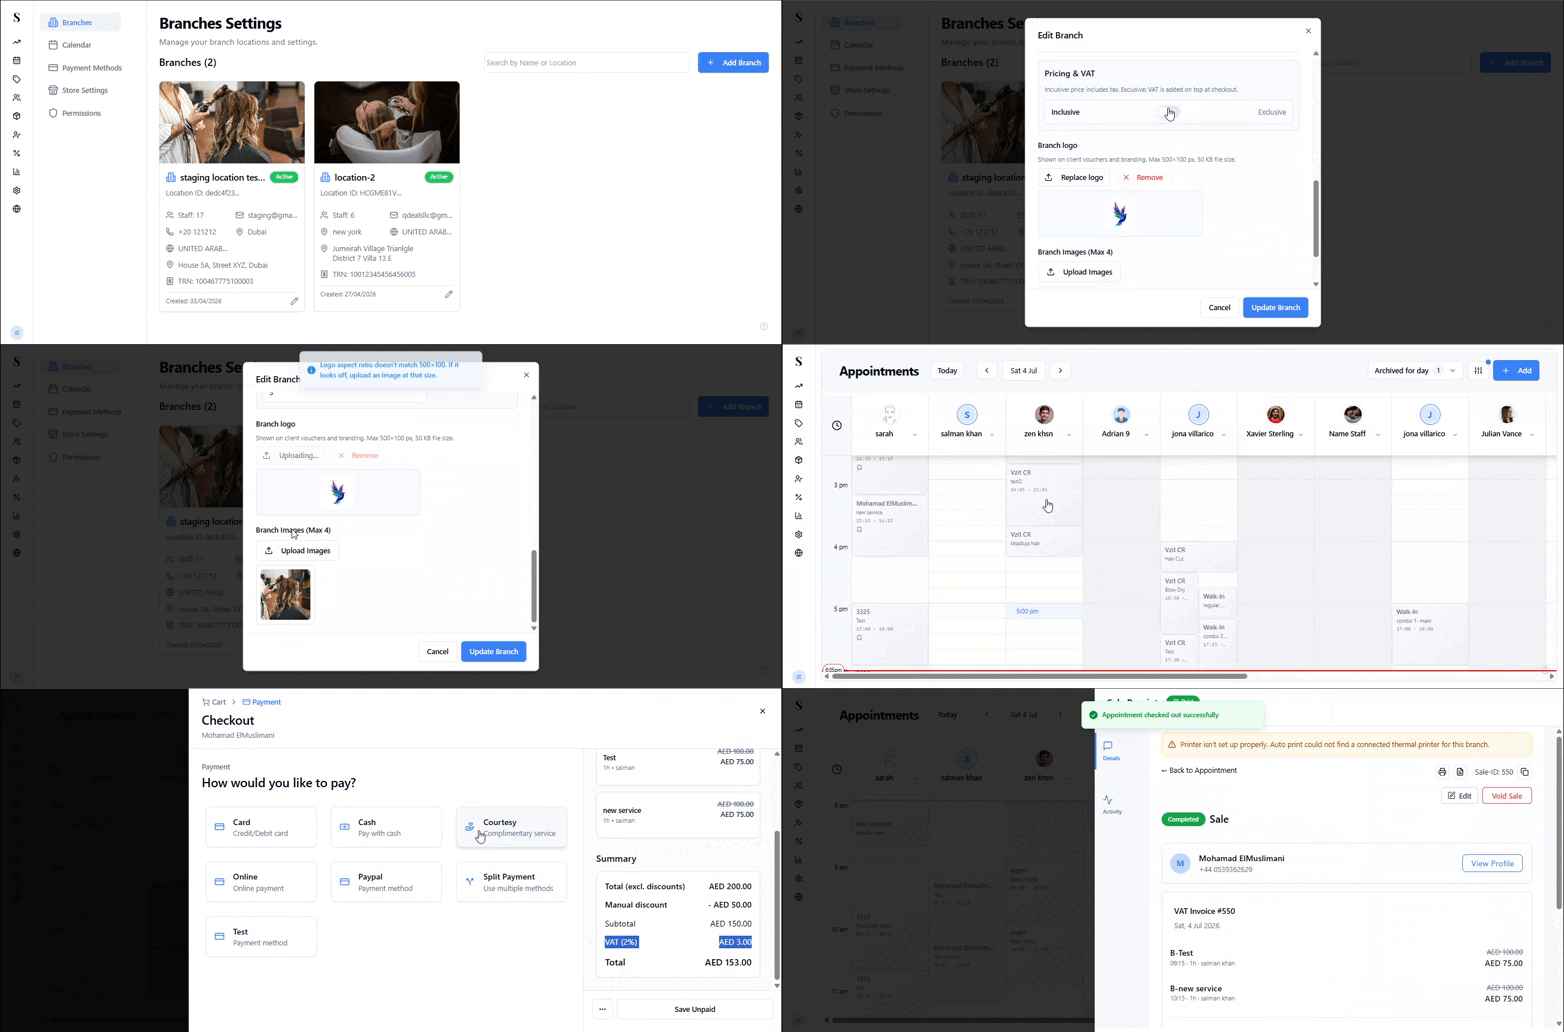
Branch logo
You can upload a logo for each branch. The logo appears on:
- Printed receipts and invoices
- The branch card on the Settings page
- The online booking page for that location
Go to Settings → Branches and click the pencil icon on the branch you want to update.
In the Branch Images section, upload your logo file (PNG, JPG, or SVG recommended).
The first image uploaded serves as the branch's primary logo on receipts and invoices.
Click Update Branch to save.
Each branch can have its own logo. This is useful if your locations operate under slightly different branding or if you want to distinguish between branches on printed receipts.
Branch images
In addition to the logo, you can upload up to 4 images per branch. These appear on the branch card and can be used to showcase each location's interior, exterior, or team.
VAT Settings (Inclusive / Exclusive)
Each branch can be configured to show prices either VAT inclusive or VAT exclusive. This affects how prices are displayed throughout the system — on the Calendar, at checkout, on receipts, and in reports.
Go to Settings → Branches and click the pencil icon on the branch you want to configure.
Find the VAT Setting option and choose:
- Inclusive — all displayed prices already include VAT (e.g., a AED 105 service is shown as AED 105, with VAT included in the price)
- Exclusive — prices are shown before VAT is added (e.g., a AED 100 service shows AED 100, and VAT is added at checkout)
Click Update Branch to save.
Changing the VAT setting affects how prices are calculated and displayed across the entire system for that branch. Make sure your service and product prices are entered correctly for the setting you choose.
With VAT Inclusive:
- A service priced at AED 105 is shown as AED 105 everywhere
- The receipt shows the VAT amount broken out from the total
- Useful for consumer-facing pricing where clients expect to see the final price
With VAT Exclusive:
- A service priced at AED 100 is shown as AED 100, and 5% VAT (AED 5) is added at checkout
- The receipt shows the subtotal, VAT line, and total
- Useful for B2B pricing or when you want VAT to be clearly visible as a separate line
To add a new branch, contact NxCut support. Branch creation is managed at the account level and cannot be done directly from this page.
Calendar
Settings → Calendar
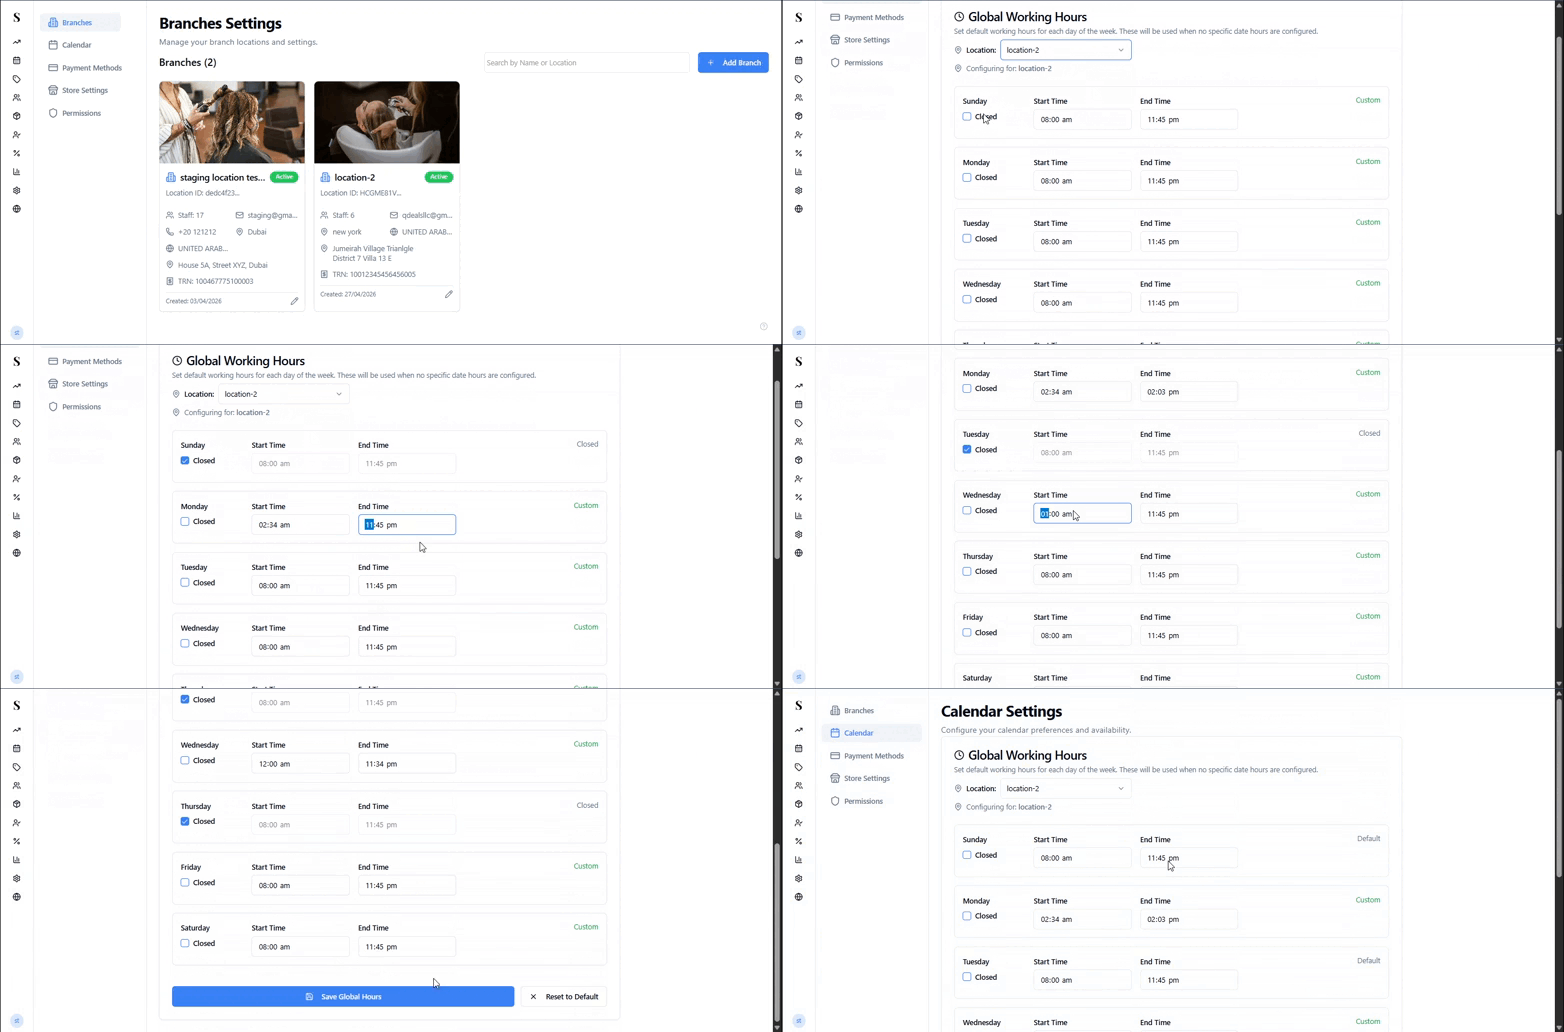
This is where you set your salon's Global Working Hours — the default opening and closing times that appear on the Calendar for all staff.
The hours are configured per location. You will see "Configuring for: [location name]" at the top so you always know which branch you are editing.
Setting your hours
For each day of the week (Sunday through Saturday), you can:
- Set a Start Time and End Time
- Tick the Closed checkbox if the salon is closed that day — it will be hidden from the Calendar entirely
- Click Default on any day to reset it to the default hours
Default hours are 08:00 AM – 11:45 PM.
Once you have made your changes, click Save Global Hours. To reset all days back to the defaults at once, click Reset to Default.
The end time must always be later than the start time. Invalid entries will not be saved.
Payment Methods
Settings → Payment Methods
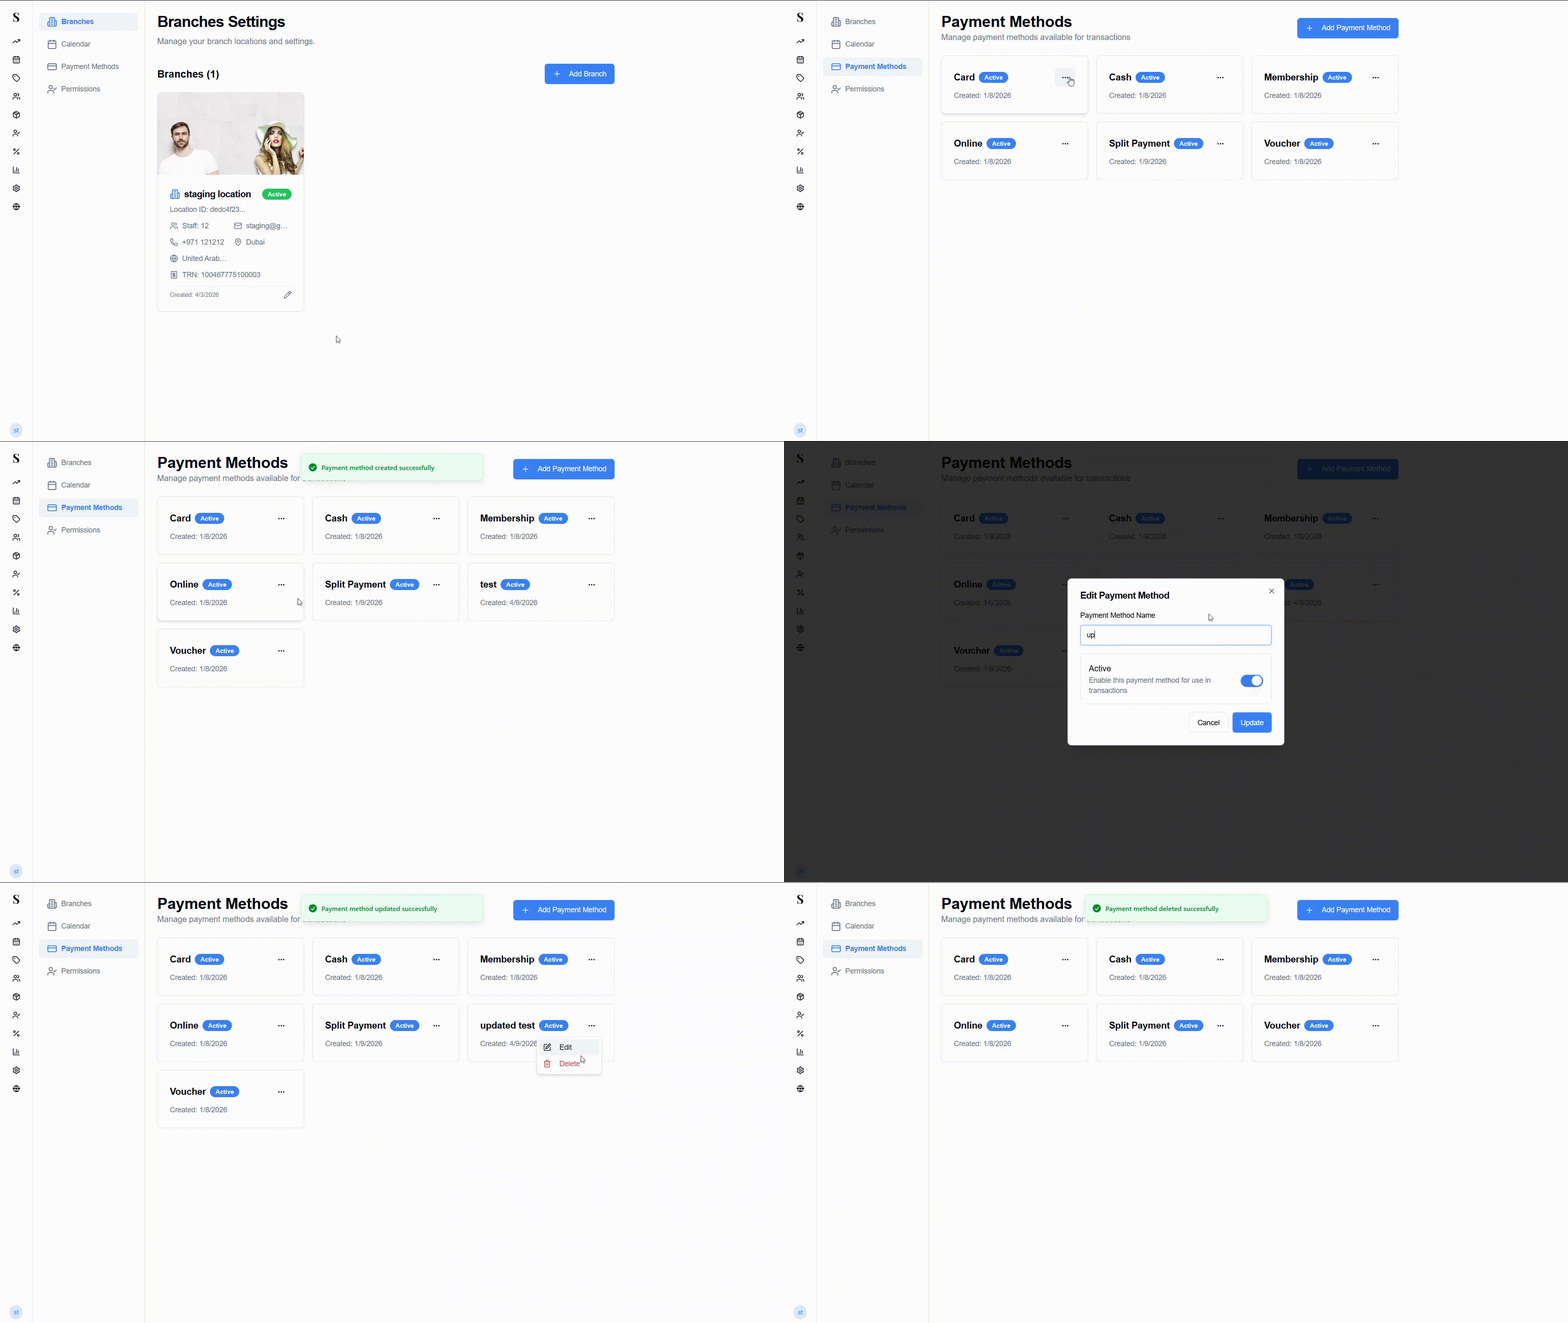
This page shows all the payment options available at checkout. The default methods are: Card, Cash, Membership, Online, Split Payment, and Voucher — all active by default.
Each method is shown as a card with its name, Active status badge, and the date it was created.
Adding a payment method
Click + Add Payment Method, enter a name, and save. The new method will immediately be available at checkout.
Editing or deleting a payment method
Click the ··· (three dots) on any card to reveal two options:
- Edit — rename the method or change its status
- Delete (red) — permanently remove it
Deleting a payment method is permanent. If you just want to stop it appearing at checkout temporarily, edit it and set it to inactive instead.
Currency
Settings → Currency
Each branch can have its own currency setting. This controls how prices are displayed throughout the system — on the Calendar, at checkout, in reports, and on client profiles.
Setting a branch's currency
Go to Settings → Branches and click Edit on the branch you want to configure.
Select the branch's Country from the dropdown — this automatically sets the currency for that location.
Click Update Branch to save.
Once set, all monetary values for that branch will display in the local currency:
- Service and product prices
- Appointment costs on the Calendar
- Checkout totals
- Dashboard and report figures
- Commission calculations
The currency is determined by the country you select. If you change a branch's country, the currency updates automatically across the entire system for that location.
Permissions
Settings → Permissions
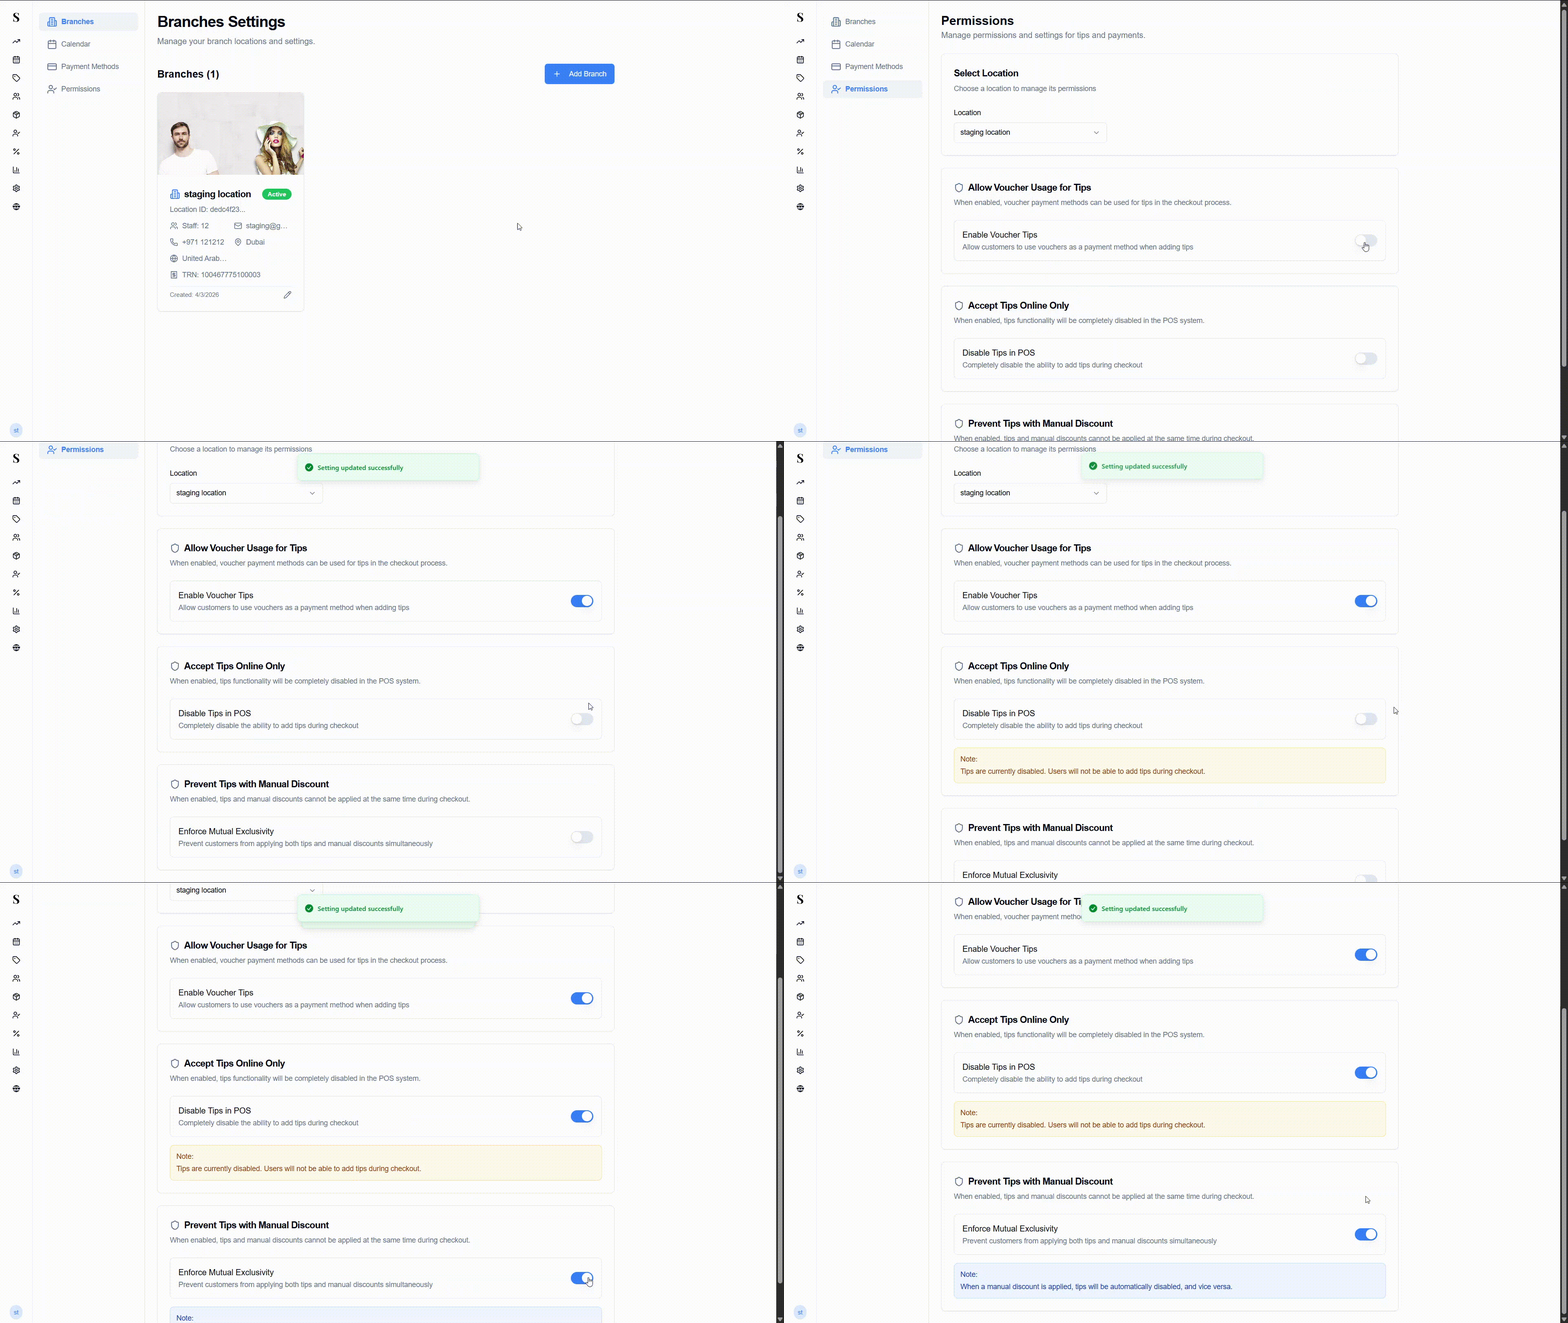
Permissions let you control the rules around tips and discounts at checkout. Settings are per location — select the location you want to configure from the Location dropdown at the top.
There are three permission settings:
Allow Voucher Usage for Tips
Toggle: Enable Voucher Tips
When turned on, clients can use a voucher as the payment method when adding a tip at checkout.
Off by default.
Accept Tips Online Only
Toggle: Disable Tips in POS
When turned on, the ability to add tips is completely removed from the POS checkout screen. Tips would only be accepted through online bookings.
Off by default.
Prevent Tips with Manual Discount
Toggle: Enforce Mutual Exclusivity
When turned on, a staff member cannot apply both a manual discount and a tip to the same sale. If a discount is applied, the tip option is disabled — and vice versa.
Off by default.